Thursday, April 4, 2013

Making Your Very Own Therapeutic Bath Salts!

It's been a while.  I can't say I've been overly busy to blog, or that I've stopped home improvement projects.  I guess it just slipped my mind to take pictures, and blogs aren't very fun to read without pictures!!


Today, I wanted to go outside and fertilize the lawn and throw down some grass seed in our bare grassy spots.  But alas, I have been ill and my husband begged me to take it easy and rest. After careful negotiation, I agreed to sit around and 'rest' and he will do the lawn this weekend.  I really think I got the better part of that deal, but I'm certainly not complaining about it.  Anyways... moving on...

What better way to take it easy and rest than a nice hot bath with some therapeutic properties?  No better way, I say!  Enter... Bath Salts!!

Now, there are a multitude of different recipes you can find online for making bath salts.  Some use food coloring, some use perfume for scent, some use baking soda, glycerin for making your skin smooth, and various other things.  I like to keep mine simple, for one, because I'm lazy and don't just have glycerin hanging around the house, and two, my skin is pretty sensitive to a lot of stuff and I find the simple recipe relaxing and non-itchy.  

If you are feeling adventurous, by all means, add some food coloring and have fun cleaning that bathtub!!  ;)

Here is what you need for my simple recipe...

Salt - I used Epsom Salt only this time around, but you can use a mixture of sea salt, epsom, kosher, dead sea, etc. or one of these other salts by themselves.
Seal able Jar
Your favorite essential oil
Spoon or other device for getting your salt in your jar
Scissors, ribbon, glue (or anything else you want to decorate your bath salt jar with)


Step 1 - Make sure you start with a clean jar.  I repurposed this jar from some other bath salts I purchased a while back.

Step 2 - Start adding salt to your jar about 4 tablespoons at a time.  

Step 3 - Each 8 tablespoons or so, add a drop of your favorite essential oil and shake the bottle to distribute.  

Essential oils are a funny thing.  If you get high quality oils, you need VERY little oil to make an impact.  If you have lower quality oils, you need more.  Keep that in mind when making your bath salt.  

For a relaxing bath, I would recommend Lavender, Peace and Calming, or Roman Chamomile.  For stress relief, perhaps some Eucalyptus, Joy, Citrus, or a combination or Lavender and Orange.  Please test out your oils before emerging your entire self into a hot vat of the stuff.

I have recently discovered a new oil called Aroma Siez from Young Living that is terrific as a muscle relaxant and works for tension headaches.  This is what I used for my bath salt this time around.  Just be aware, it is STRONG. 

Step 4 - Continue to fill your jar with salts, then drop of oil, layering them and shaking the jar to mix them up until your jar is mostly full. 

Step 5 - Decorate your bottle to your hearts content.  If you are good at tying ribbon, that might be the easiest.  I am no good at cute bows, so I just glued a strip of ribbon on my jar that matched my bathroom.  


My finished Bath Salt Bottle!
Step 6 - Run a warm bath and add a few tablespoons of your salt to the water.  

Okay - so a few tablespoons probably doesn't seem like much.  Depending on the salts you are using and the oil you are using, you can certainly use more.  I find using more ends up being a little overpowering.  I mean, I'm trying to relax; I am not trying to kill myself with strong smells and burning salt.  :) 

Using very hot water will heighten the effect of the bath as well.  As always, when dealing with essential oils and Epsom Salt, be careful.  I don't need you blaming me cause you got a little overly excited about your new bath salt. :-D

This bath salt and blog is not intended to treat or diagnose any disease or ailment you have.  I just like the stuff... I thought you might, too.  :-)  Now, go to your bathroom, dim the lights, take a good book or some relaxing music, and soak to your hearts content.

Tuesday, September 4, 2012

Chester The Cat Paints A Picture

I came down with this icky cough due to cold thing that I have been fighting for days, no weeks, now.  So my projects have slipped by the wayside, as has my blogging.  But today, I have a special treat.

Chester - The Cat Who Paints!

If you read my blog, you will undoubtedly remember my little Chester - the cat who likes to craft.  Well, it's more like he just wants to be in the middle of EVERYTHING I am doing.

Chester with his paintbrush on a pre-painting day.
I discovered that Chester loves to play with and carry around these little black sponge paint brushes.  Despite my best attempts to hide them, somehow, he finds them and spends hours upon hours playing with them.  

I took some pictures of him with his brush and showed some friends.  One friend said I should let him paint - like for real.  Crazy, right?

Well, - one bored evening, I put out some paper, gave him some paint, and let him go to town!

His masterpiece ended up being the birthday present to said friend who had the idea. 

Paints, Check!
This is interesting...


  It didn't take him long to figure things out.  Once he did, he was jumping and swatting, batting, and alas, painting an abstract.
Ah-HA!  Attacking the paper is fun!

So, if I take the brush like this...

Gizmo, Chester's sister, 
getting in on the action


I need a beret - I am that awesome!
That's McCheetoh Van Gogh to you!
I need more pink, Mom!
Chester McCheetoh Van Gogh Original

Alright, so in the end, I helped by unscrewing the lids and pouring the paint on the brush.  But he and his sister did the rest.  Not bad for a painting cat, if I do say so myself!  Hats off to you, Cheetoh Head!

**Disclaimer - No animals were harmed in the making of this painting.

Monday, August 20, 2012

Laundry Room - Final

I must say, I am very proud of myself for finishing up this project so quickly.  Just one weekend and a couple evenings and it was all done.


I started with these stark white, plain and boring walls.  Chester was super excited to help paint the walls!  I gave him his very own sponge brush.  He didn't get to play with paint, but he had a blast with the paintbrush. 

Anyways... on to the decorating...
I made this valance from some cotton fabric I found at Joann's on sale for $2.99 a yard.  I got the curtain rod on sale for $3.99.  It took about 15 minutes to sew together, press, and put on the rod.  It took me 45 minutes to move the washer and dryer out so I could hang it on the wall.  haha. 

Blue, white, chocolate brown and grey!  I love them!!

To make the valance, I took a piece of fabric and folded it in half lengthwise, so I didn't have to hem the bottom.  I hemmed each side by just folding the fabric over twice and stitching, and then I created a casing at the top just a little larger than my rod.  Slide the rod through, and wallah... squarish valance.  I think it has the perfect amount of wave and boxy for the room, and the fabric matches perfectly.


If you followed my previous post, you know that I picked up some crates from Joann's and whitewashed them.  I treated them all with a matte finish sealant to prevent anything bad happening to the wood. 

Then, Chester and I worked together to hang them up.  Chester tried to hand me a screw or two, but mostly they just ended up on the floor and under the washing machine.


I pre-drilled each crate in the back with small holes where the screws would attach to the wall.  Each crate has 4 screws to make sure it supports the weight of my cleaning and laundry stuff.


Then, I hung up my key holder/chalkboard/cork board (instructions to make this in previous post) with some heavy duty screws.


I placed all my odds and ends on the shelves, stuck my little blue and brown circles in a random pattern all over the room, and added a teddy bear, because I love teddy bears.

It turned out pretty well if I do say so myself!  On to the next project!


Sunday, August 12, 2012

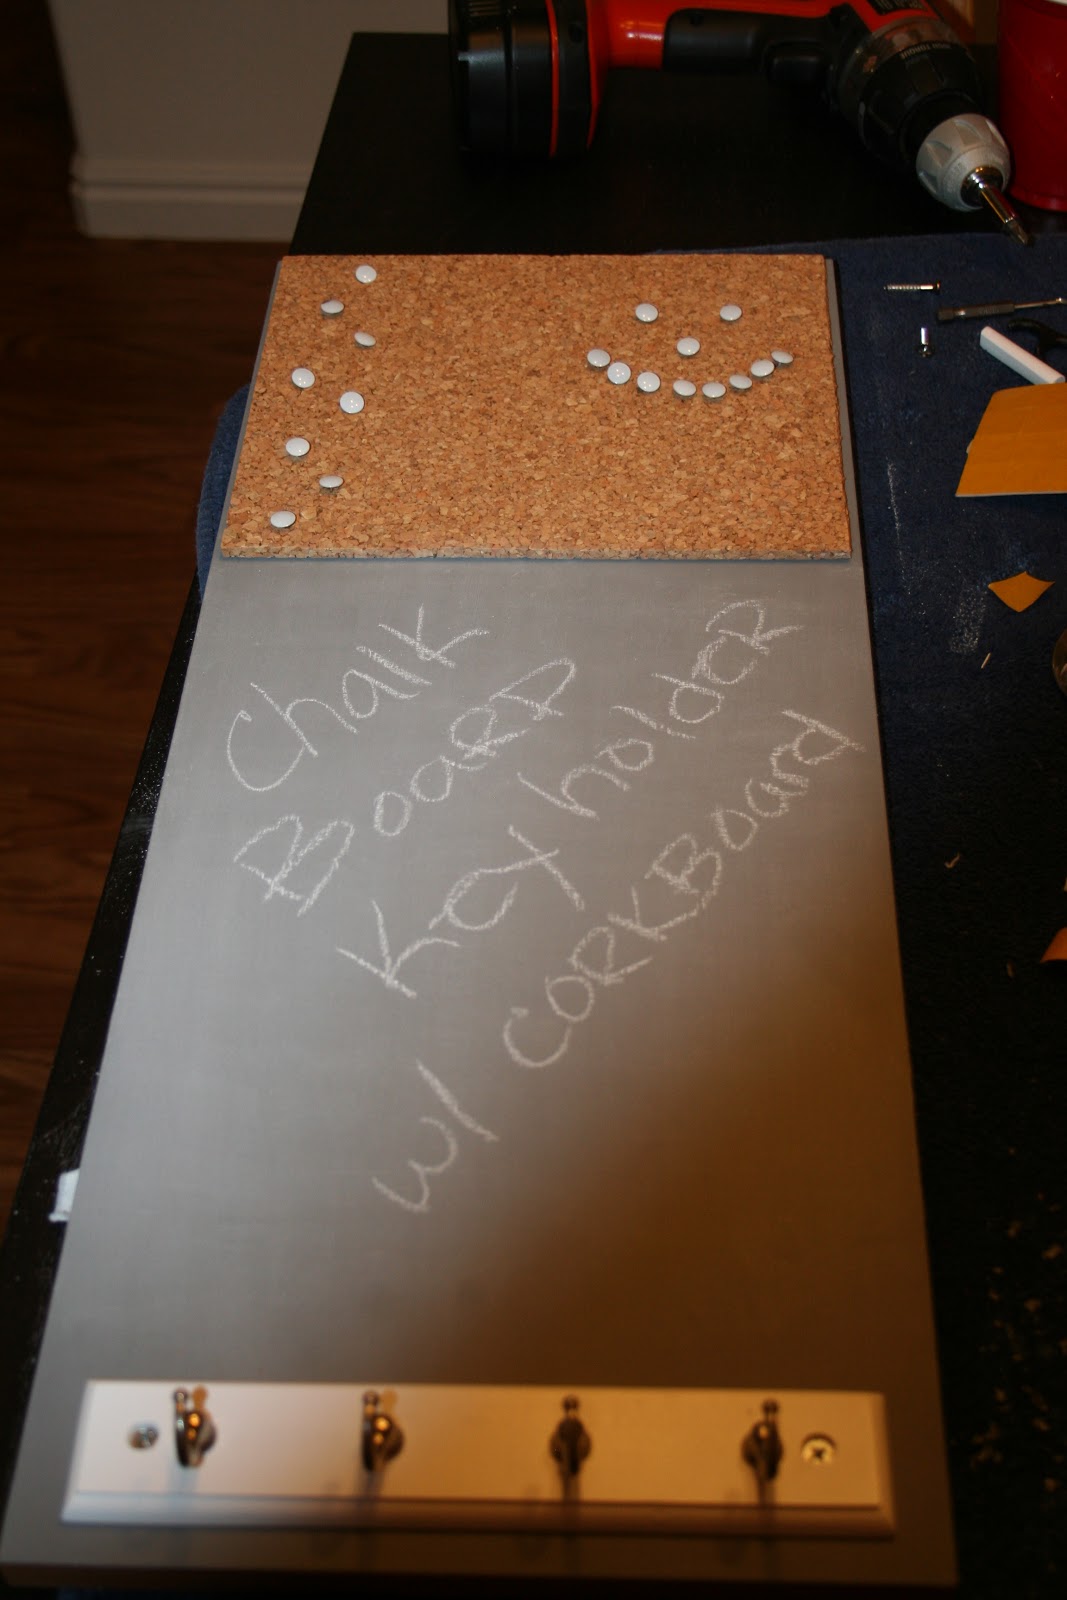
Chalk/Cork Board plus a Key Holder!

I must say, I am so excited about this project.  
It was easy and super quick to put together.

  
The inspiration for this project:
 
I have been reading about the DIY chalkboard paint for a while and have wanted to try it.  I am re-doing our laundry room, and I thought it needed something where we could leave notes and hang keys, since it is right off the garage.  

That being said, I came up with this little board after looking for something similar online that would fit in the small wall space I had due to an awkward window.  I couldn't find anything the right size with all the elements I wanted.  My philosophy... If you can't buy what you really want... don't settle.  Make exactly what YOU WANT!! 


This whole project from start to finish took only about an hour and the cost was about $17.


What you'll need:


  • Wooden board (cut to whatever size you desire)*           
  • A bottle or 2 of acrylic paint - color up to you
  • White Dry Non-Sanded Grout* 
  • Cork board pad (I found mine in the office section of Walmart for $4.99)* 
  • Hooks (I used an already made wooden hook plaque that I picked up for $2.99 at Walmart)* 
  • Cup to mix your paint
  • Stir stick for your paint
  • Sponge Paint Brush
  • Measuring Cup & Spoons
  • Scissors
  • Thumb Tacks
  • Chalk*
  • Hanging Hardware & Tools
**You can substitute premade chalkboard paint from your local craft store for the paint and grout, but I wanted a specific custom color and made my own.
Depending on how crafty you are - you may have a lot of these items already.  I've starred the ones I had to actually buy to give you an idea.  I picked up my board at Home Depot.  It was actually a pre-made shelf in the organization aisle - $3.99.  I was worried the paint wouldn't stick right on the laminate slick finish on my shelf, but it did fine.  While I was there, I picked up this giant box of grout.  It was the smallest box I could find and it was around $5.  

You can find paint, cork board pads, hooks, and everything else at your local Walmart pretty inexpensively.  You may even be able to find the grout and board... who knows.  Okay - on to the instructions...

Chalkboard Paint - I chose light grey to match my decor.  :)
Step 1:  Measure out 2 teaspoons grout to every 1/4 cup paint.  I was especially worried about my paint sticking to the slippery surface, so I put in about 2 1/2 teaspoons to my 1/4 cup paint.  I don't know if it made a difference or not, but the board isn't too rough and it stuck just fine.

Step 2:  Mix up your paint really well with a stick.  I had a kabob stick on hand - I just used it.  It worked fine.  Make sure the paint is mixed thoroughly.  It will be really thick!


Thick goopy paint.
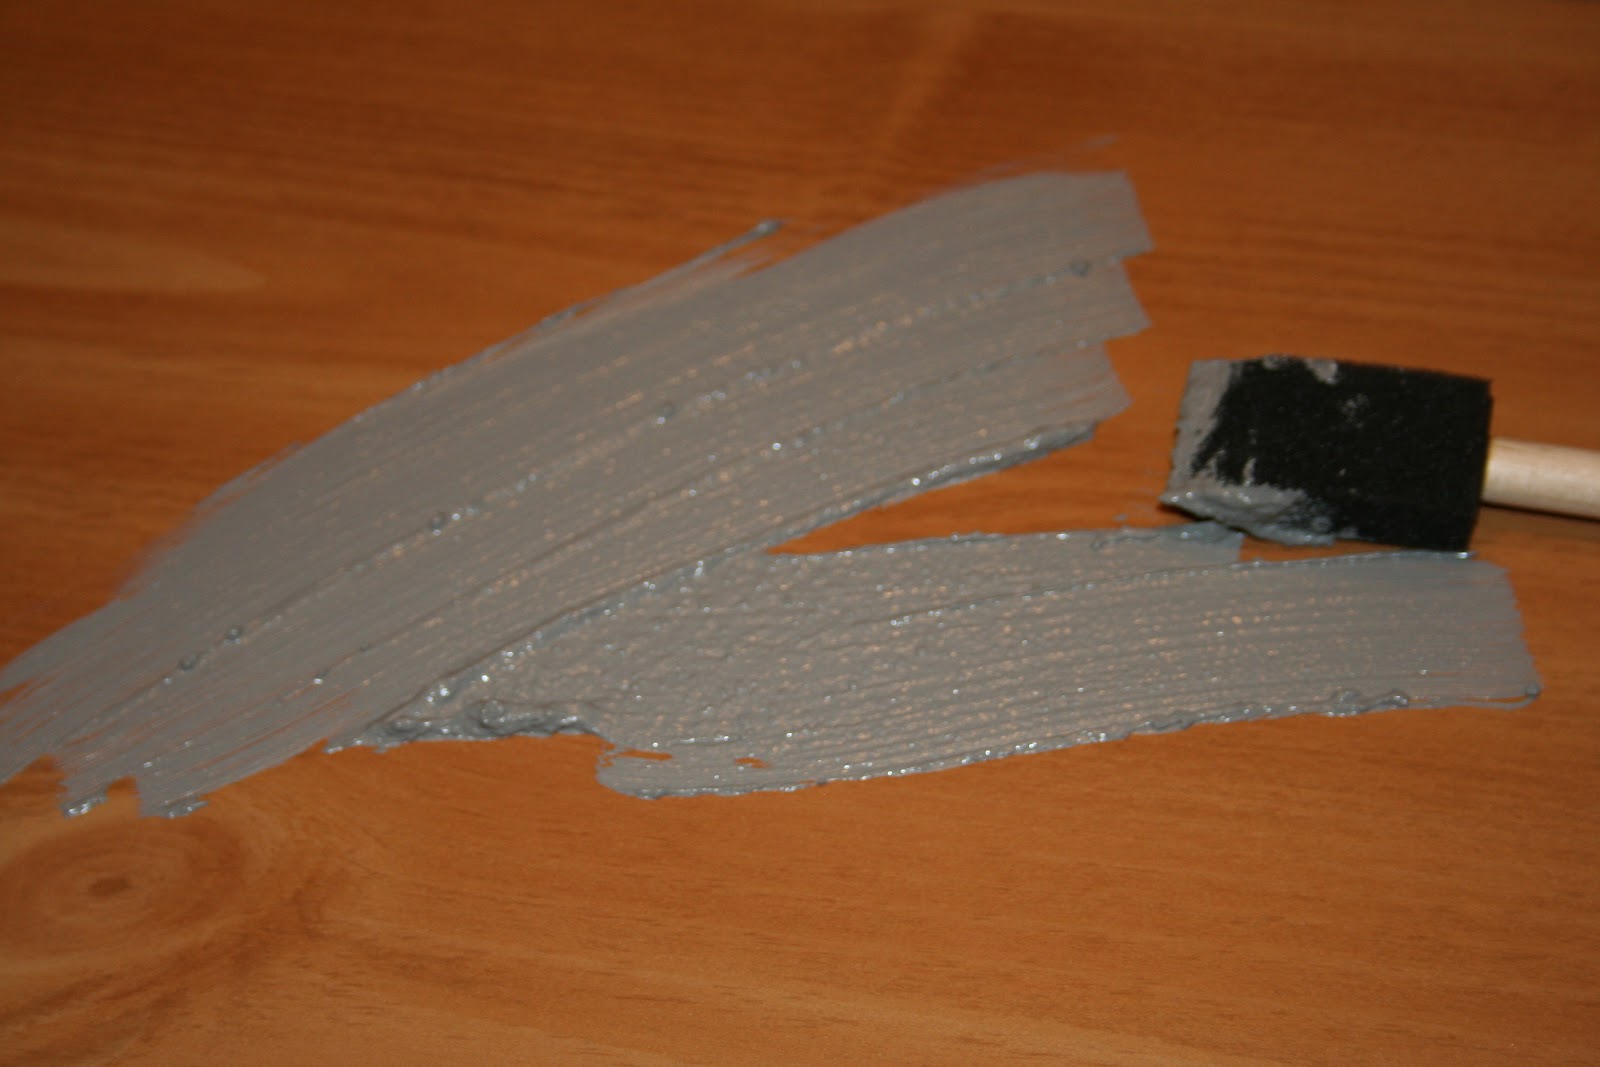
Step 3:  Paint your first coat on the board.   It's going to go on very thick, making you think you've done it all wrong.  As you paint, the grout will even out, so don't worry.  Make your first coat light.  You are going to want to put several even light coats on to make this work.  Your first coat is going to look pretty awful... again, making you think you've done it all wrong.  You haven't.  Below is my board right after the first coat.

First coat of paint... Looking pretty gnarly!

 Step 4:  While your first coat of paint is drying, measure your cork board pad.  Originally, I was going to do rounded corners on my cork board and make it a little larger, but as I started to measure it out, I decided I liked mine square just a little smaller than the board so the grey paint acted as a small border.  This is really up to personal preference.  


Cut your cork pad to fit your board.


To ensure a clean cut, I taped the area I needed to cut, and then drew with pencil where I wanted to cut.  I used scissors to make the cut, but I think you would get a cleaner cut if you used a box knife and hard surface.  Scissors worked fine, but it left a very slight raw edge.


Right after my third coat of paint.  I was still a little nervous.
Step 5:  Apply your second and third coat of paint.  Make sure you let the second coat dry thoroughly before doing the third.  

If you feel you need a 4th coat to make it even, do that after your third coat dries.  3 coats worked fine for my board.  Until completely dry, you won't know what it looks like, so be patient.  

I thought for sure mine was going to look horrible when it dried, but it ended up perfect.  The paint actually dries fairly quickly.


Step 6:  Once dry, take a piece of chalk and rub it all over the board to "prep" it.  Then erase the chalk.  I am not sure what this does, but everything I read said it was a necessity with DIY chalkboard paint.


Attach cork pad to your board after paint is dry.
Step 7:   Attach the cork pad.  My cork board pads came with sticky adhesive stuff;  I just used that to attach it to the board.  I put enough adhesive strips to cover all corners and edges, and then I added a few in the middle.  You can probably glue the cork pad to your board if you didn't get adhesive strips.  The reason I like the strips is because they lift the cork up slightly to allow for the push pin to go in a little further.  Cork pads generally aren't very deep. 


Screw Hooks
Step 8:  Attach your hooks.  I pre-drilled holes onto my board where the hook plaque holes were to ensure the wood didn't split when I attached the hooks.  I used the screws that were provided with my hook plaque to attach the hooks to the board. 

If you are using the little hooks that screw in, I would probably pre-drill small holes about 1/4 of the depth of the hook screw into the wood to make sure your board doesn't split and that they go in evenly.

I chose the plaque because I liked the hooks on it and thought the white plaque gave it more character.  Again, personal preference.


Step 9:  Attach hanging hardware to the back of your board.  I haven't done this yet, because my laundry room is under construction still.  Make sure you use hardware that will support the weight of the board you are using!!  You don't want your board falling on your over-zealous, curious cat. :)


That's it!  I used 2 of my hooks to store a piece of chalk.  I may attach some sort of little holder for an eraser and chalk at a later time.  Overall - I am thrilled with how it turned out - and the grey matches my washer and dryer knobs and the fabric in my blue and grey striped valance fabric.  :-D

Now I might not forget my lunch on the way out the door... and I *might* remember to grab that 25% off coupon I got in the mail 2 weeks ago that is now hanging up instead of in a big pile of mail!  

Friday, August 10, 2012

Floating Shelves

"Umbra Conceal Floating Book Shelf"


I must say, I am so excited about these floating shelves!  I picked some up on amazon.com for less than $10 each with free shipping.  I would say if you get a few, they are probably about the same cost as a normal bookshelf, but with so much more personality!  :)


We don't have a lot of room in our living room for an extra bookcase, so my books have been sitting in boxes for about 2 years now.  I came across these awesome hidden floating shelves, and figured they would kill 2 birds with 1 stone. 


Wall art plus bookshelves.  

Amazing!

Thursday, August 9, 2012

Projects Galor... 1st Up - Laundry Room!

For anyone that knows me, you can attest... I always have big dreams, and then I get side tracked.  It's like I have home decorating/craft A.D.D.  

I have a hard time finishing anything.  Maybe if I start a blog with my ideas... I will want to have "after" blogs and it will keep me motivated.

So, Project 1:  White wash crates acting as shelves in the laundry room. 

Let me back up... I have been wanting to redo (or do for the 1st time) our laundry room.  We have a crappy shelf in there that is about to come out of the wall that doesn't match anything, and it is just... blah.

So, I have been thinking of installing a regular cabinet in there.  Then, I saw these great crates at Joann's. 

They were arranged in a display at the store, and I immediately fell in love with the idea of hanging several on the wall as shelves. It helped that they were $6.99 per crate with my coupon and on sale!  That beats the $150 wall cabinet I was looking at!

Bubble Circles for my laundry room
"Why are these so exciting and pretty much perfect?" you ask.  Well... the rest of my laundry room vision includes very light baby blue walls with blue and brown circles on the wall (to imitate the look of bubbles.)  See picture.  :)  I picked up the circles on amazon.com for pretty cheap a while ago.
Cute Bed Bath & Beyond Rug

Then, I picked up this rug from Bed Bath & Beyond. <3 I think the whitewash crates will fit right in with the decor.  I'm actually excited to get it finished!
 
Anyways... back to my crates... they are deep and big enough to hold the detergent, fabric softener, and various other laundry room items, sturdy enough to hold the items and (if installed properly in a stud) won't move on the wall, and they are cute, cute, cute!  Not to mention, they are fully customizable.  If I don't like the whitewash anymore, I can redo them! 

So, I am in the process of painting my crates.  Chester (the cat) is helping!  Wish me luck.  :-D

Friday, August 3, 2012

My Newest Art Project... Live, Laugh, Love.

My Newest Art Project... Live, Laugh, Love.

I needed something fun for this tiny wall, but I couldn't really find anything I liked that matched the decor.  I finally decided to paint something myself that captures my personality.  Here is what I did...

I painted canvases to match the wall color on the opposite wall. I have one wall painted this dark green color, and the rest of the walls are an off-white / greyish color.  Finish it off with white trim, and wahlah, my living room.  

Anyways, back to my project... 

I hand painted a fun saying on each canvas - one of my favorites!  Then I drizzled some green paint over the saying and blotted it out for a washed out look. 

Because the canvases are all different sizes, I chose to hang them sideways for a more unique look.

Not bad if I do say so myself.  Abstract with a little bit of structure.
It speaks to me (even if it just says homemade artwork.)